Make Your Own Memories - DIY Scrapbook
Leave it to Eclipse Day to bring rain and low lighting - not good for pictures, but very good for my creative juices. I made a scrapbook to thank my bae's family for our trip to Colorado and reflect on the good times we had there. I put together the steps going off of a picture I saw on Pinterest, simply because I like a challenge :)

WHAT YOU NEED
- cardboard paper (I bought a ton of cheap notebooks and used the backings)
- colorful scrapbook paper
- cardstock paper
- square photos (mine are from Parabo)
- super glue (I used Gorilla Glue just to be safe)
- scissors
- washi tape/double-sided tape
- binder clips
THE PROCESS
1. Cut your cardboard paper into rectangular shapes that are larger than your print. Include a space for the bind about 1 inch wide.
2. Measure the cardstock to the same height as the scrapbook pages. Then, multiply the number of pages you'll have by 2 - there are two sides to every slot in the bind, so this will give you a place for each page. Draw the sections with a pencil.
3. Here comes the fun part! Accordion fold the cardstock on the pencil lines, making sure you start and end with the paper facing up. I would make a fold, then flip the paper over to make the next fold. It gets tricky when the folds become thicker but keep the sections as close to the same size as possible. My pages turned out a little uneven because my folds were different sizes, but I kind of like the handmade look.
4. Insert the pages into the slots and glue each side of the page to the bind. I put the bind flat on my desk, then inserted the pages in from the top. This made it easier to glue and hold the pages while they dried. If you have binder clips, these are very useful for holding pages together. If not, use a heavy book.

5. Measure your colorful paper to the height of the bind and wrap it around to see where you need to cut - it should cover up the accordion folds completely. Then, fold the colorful paper to fit the scrapbook and put super glue on the inside of the front and back flaps. Insert the scrapbook and hold it together as it dries.
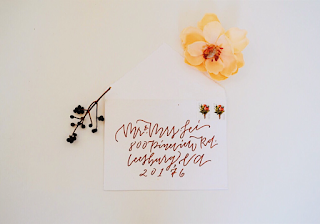
6. Decorate the cover and start filling it with memories! I taped my photos down with washi tape and left room for captions. E and I are going to handwrite them to add one more personalized touch.


I can't wait to share this with their family and to see what you create! If you try this DIY, post a picture of it on Instagram and tag me (@indiagarrishdesigns) or send in a direct message - I love seeing your ideas!
Have a cozy Eclipse Day :)
- India
P.S. I have a discount code on my other Instagram page for $10 off your first order of Parabo prints - check it out here!
Comments
Post a Comment